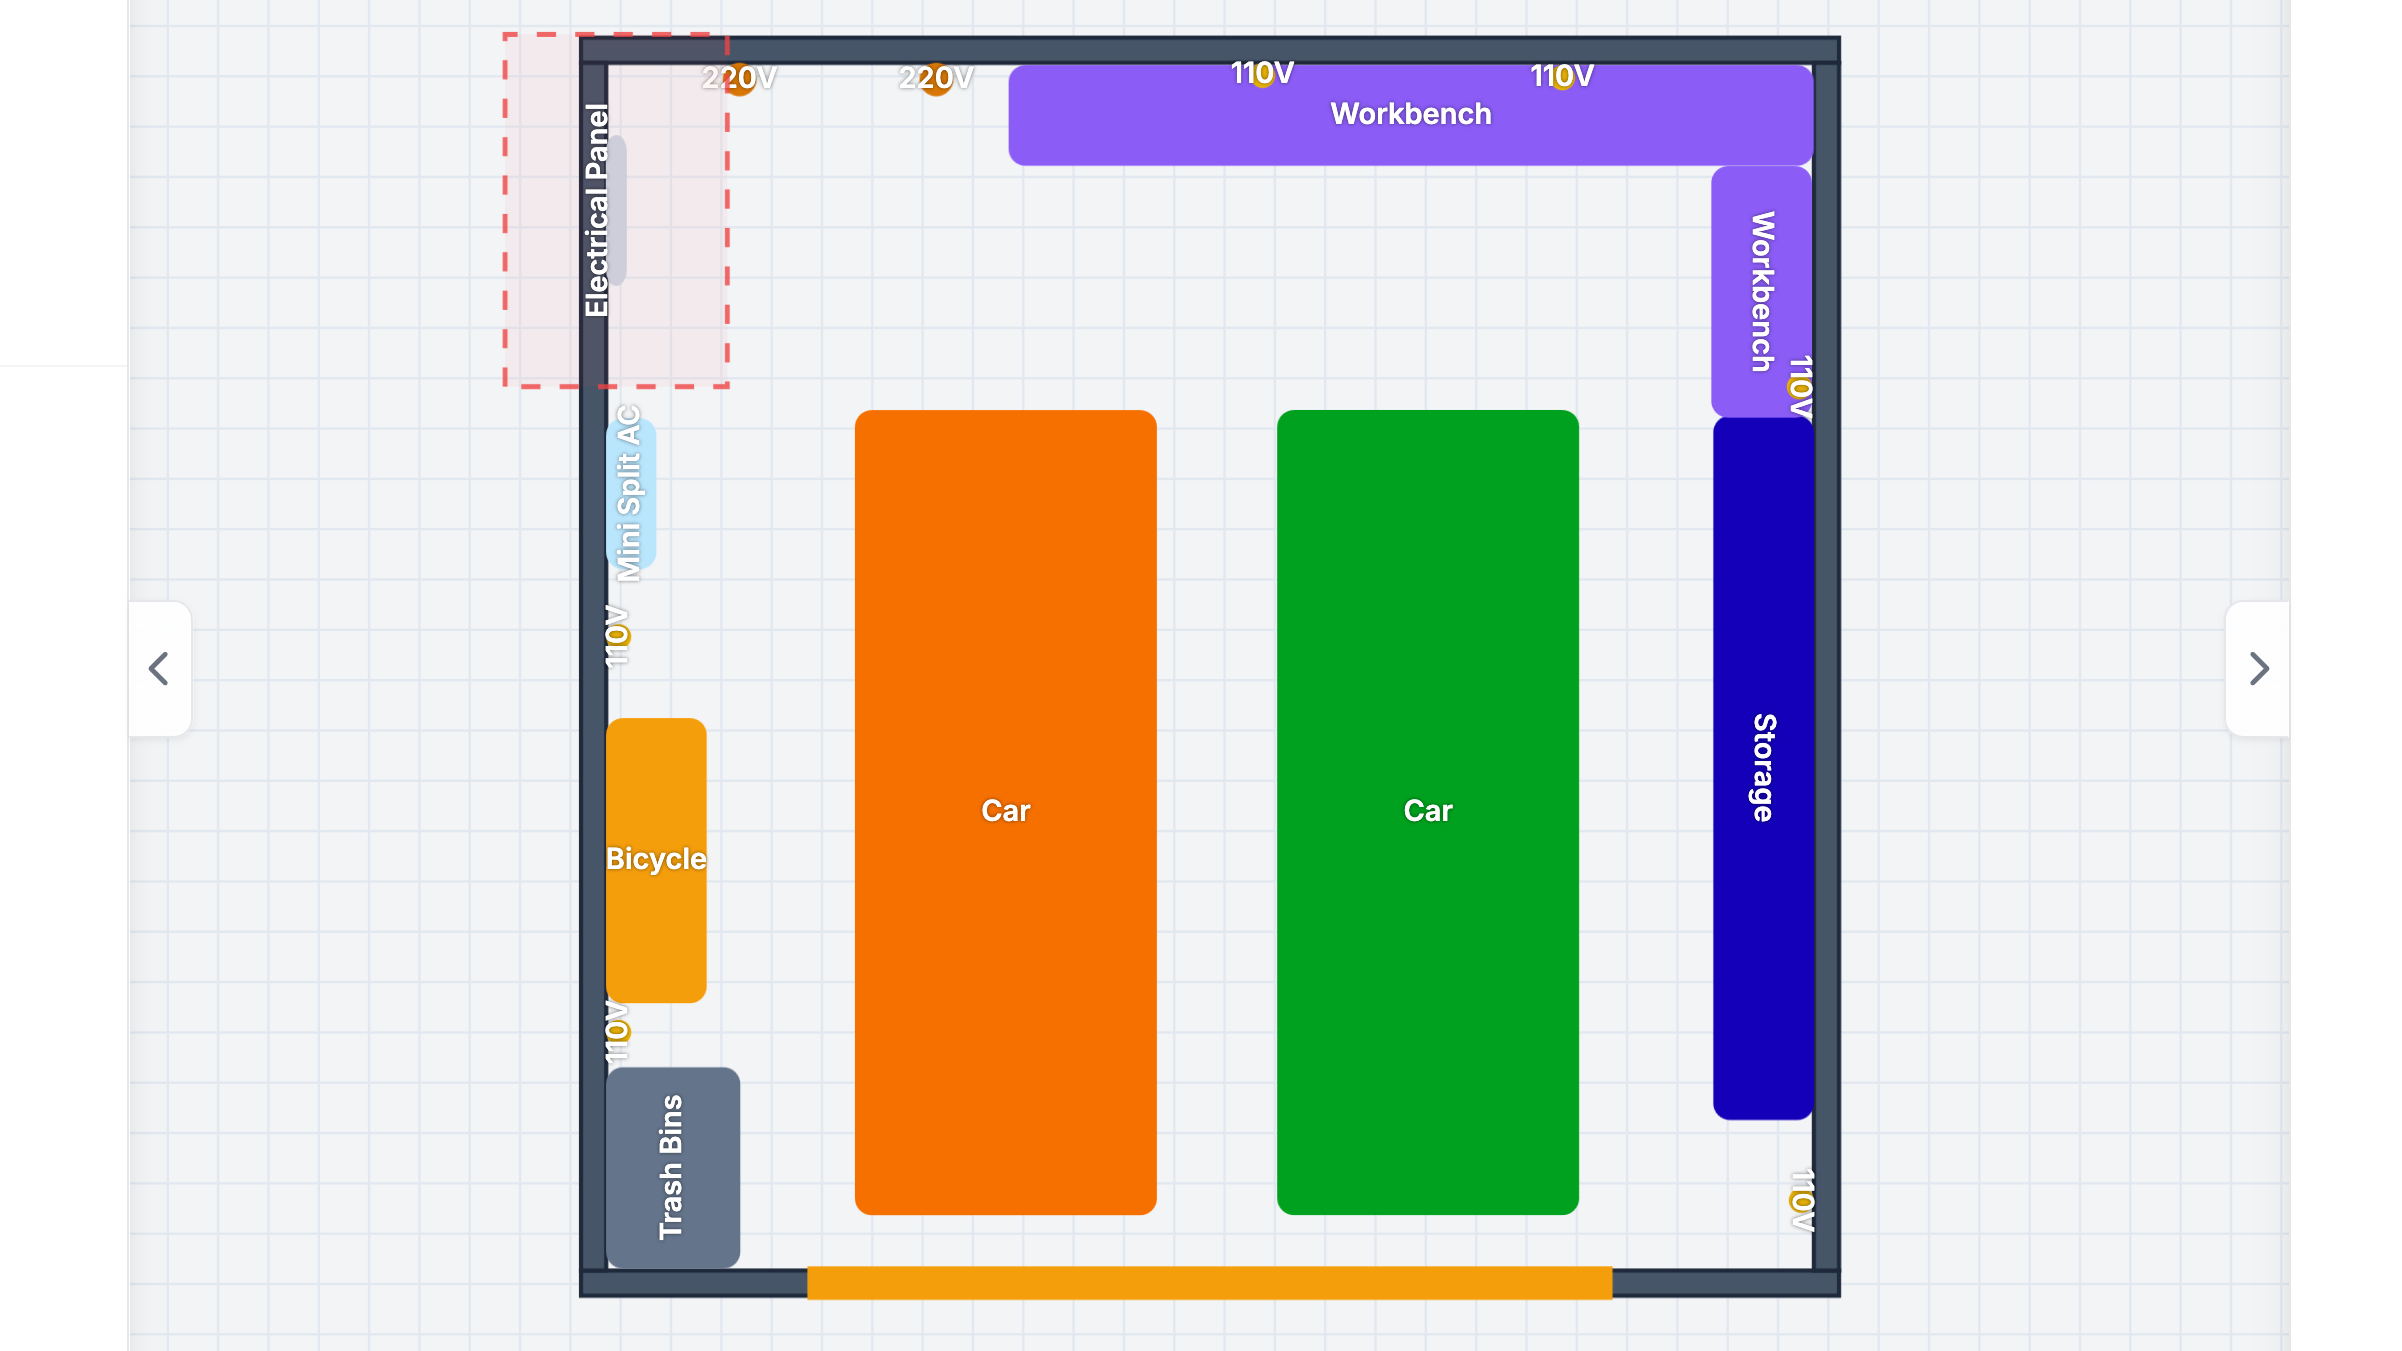
Most garages were wired for a garage: one light, one outlet, done. The moment it becomes a workshop — compressor, welder, dust collector, heaters — the single 15-amp circuit becomes a fire-adjacent annoyance. Here is how a proper workshop garage is wired.
Start With the Loads
| Equipment | Running Watts | Circuit Needed |
|---|---|---|
| LED shop lights (whole garage) | 100–200W | Share a lighting circuit |
| 1/2" corded drill, saws | 600–1,500W | Shared 20A receptacle circuit |
| Air compressor (2 HP) | 1,500–2,400W | Dedicated 20A, or 240V |
| Table saw / cabinet saw | 1,800–3,000W | Dedicated 20A, or 240V |
| Welder (hobby, 140A) | 3,000–4,500W peaks | 240V / 30–50A |
| Electric heater (5 kW) | 5,000W | Dedicated 240V / 30A |
| Mini-split (12–18k BTU) | 800–1,800W | Dedicated 15–20A, 220V usually |
The pattern should be obvious: everything with a motor or a heating element wants its own circuit. Hand tools are the only things that share happily.
The Standard Workshop Circuit Plan
- Two 20-amp receptacle circuits around the walls (12-gauge wire). Code requires 20A circuits in garages anyway; two means the compressor and the miter saw are never fighting. Put outlets every 6 to 8 feet so you never need an extension cord.
- One lighting circuit for all fixtures, so a tripped tool outlet never leaves you in the dark mid-cut.
- One dedicated 20A circuit at the bench location — this is where the big bench tools and battery chargers live.
- 240V provision even if you do not need it yet: run a 10-gauge, 30–50A circuit to where a welder or compressor would sit. It costs little during a rewire and everything later. Our lift guide owners usually thank themselves for this one.
GFCI, Code, and Honest Disclaimers
- All 125V, 15–20A receptacles in garages must be GFCI-protected under US code (NEC). GFCI receptacles or a GFCI breaker both satisfy this.
- Outlets in unfinished walls need boxes; nothing runs through fire blocks unprotected.
- A subpanel in the garage (typically a 60–100A feeder from the house) is the clean way to get multiple 240V circuits without filling the main panel.
- We are planners, not electricians: local codes vary, permits exist, and panel work is genuinely dangerous. Use this to plan the layout and the outlet counts, and have the final work inspected.
Plan Outlets With the Layout
Place your bench, compressor, and lift in the planner first — then mark where each outlet and 240V drop needs to land on the wall behind them.
Open Free Garage PlannerOutlet Placement Details That Matter
Outlets sit roughly 44 to 48 inches off the floor in a workshop — above bench height, below shelving, and out of the snow-splash zone near doors. At the workbench, add a power strip on the pegboard rather than wall outlets, because bench tools move constantly. And leave one outlet near the garage door opener (most openers are hardwired or need a receptacle within reach) and one at the freezer or fridge location, if either lives in the garage — those belong on their own circuit so a tripped saw never thaws your food. For the heating side of the electrical equation, see our garage heating comparison.
Panel Capacity: Do You Have Room for Any of This?
Before planning circuits, open the panel and count. You need to know three things:
- Free breaker slots. Two 20-amp receptacle circuits, a dedicated bench circuit, a lighting circuit, and a 240V run means five slots at minimum. Most 100-amp panels are already full once a house has a dryer, range, air conditioner, and general lighting.
- Service size. A 100A service can usually carry a modest workshop load. Once you add a welder, a 5 kW heater, a big compressor, and a future EV charger, the honest answer is often a sub-panel or a 200A service upgrade.
- What "dedicated" costs you. Every dedicated circuit consumes two slots when it is 240V, and tandem breakers are not permitted on every panel bus.
A garage sub-panel is frequently the cheapest path forward: one 240V feeder from the house panel to a small panel in the garage, then every workshop circuit lands where it is convenient to reset. Plan for it early, and reserve the wall space — a panel needs clear working space in front of it that no shelf, cabinet, or parked car may occupy.
Wire Size, Voltage Drop, and Long Runs
- 20A circuits: 12-gauge copper, no exception. Fourteen-gauge wire on a 20A breaker is how garages get warm in the wrong way.
- 240V at 30A (small heater, hobby welder): 10-gauge. 240V at 50A (larger welder, EV charging, big compressor): 6-gauge copper for typical runs.
- Voltage drop: a welder in the far corner of a long garage, fed from a panel at the opposite end of the house, can see a noticeable dip during inrush. Runs beyond roughly 100 feet often call for one size up. A sub-panel in the garage solves this and most future problems at once.
- Receptacle spacing: the goal is that no tool ever needs an extension cord. Outlets every 6 to 8 feet along the walls, plus a cluster at each bench, achieves that in most garages.
Lighting and Switching Details
Put every light in the garage on its own circuit, so a tripped tool outlet never plunges the room into darkness mid-cut. Then think about switches: a garage with two service doors wants 3-way switching at each, plus a switch reachable from the car door, because a light you cannot turn on before stepping inside is a light you will leave off. If you plan overhead storage or a lift, coordinate fixture positions with the ceiling plan — a fixture sitting in the path of a ceiling rack is a fixture that ends up in the trash. Our workshop lighting guide covers fixture layout, and the storage clearance guide covers keeping the space around that hardware usable.
One last habit worth building: label the panel. Every circuit in a workshop ends up feeding something surprising six months later, and a handwritten index on the inside of the door costs nothing.